
This was a project undertaken by Felix in Glastonbury in late 2012 after trying to get hold of
some of the cranked type track rod ball joints, these are rare and very hard to find.
All text unless it is *ed and a different colour is copyright Felix (R)2012 anything else is what I have bunged in :)
Felix has put in a disclaimer and I will too, if you try this be it on your own head, dodge50.co.uk takes no responsibility for any injuries, accidents, incidental costs or any other problem that arrises from using what is written below, there I said it and now on to the How to Build a Track Rod Workshop.
Over to Felix.
DODGE 50 TRACK ROD
Introduction; Why make a track-rod for a Dodge 50?
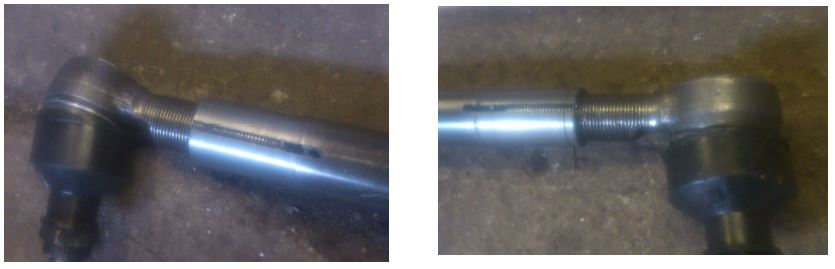
Dodge 50 trucks have several configuratioins of track rod / track rod end depending
on the year and model. Track rod ends can be of two types, the variation being to the
threaded shank that goes into the track-rod; one is short and straight, the second type,
usually fitted to the mark II, is cranked with a length of plain shaft between the cup
& ball and the threaded end section.
This second type is considerably longer than the
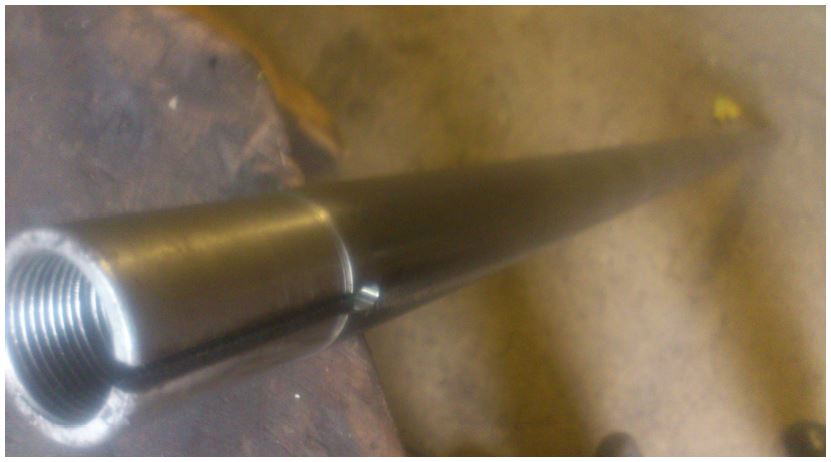
first, hard to obtain and quite expensive if it can be found. Track rods made to accept
the cranked T.R end are machined with the thread beginning about 1 ½ inches from
the opening, so the T.R. end is clamped on the unthreaded section after fitting and
adjustment. The first type is threaded all the way to the open end, and the T.R.end is
clamped on the threaded shank.
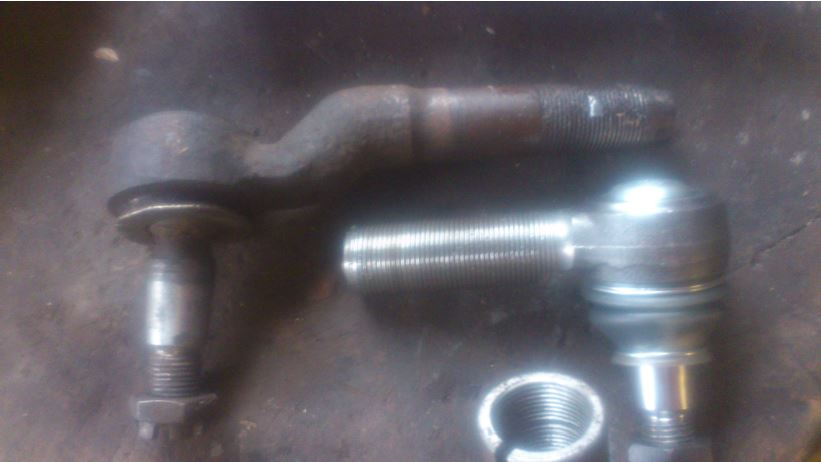
Two types of track rod end.
The mark I truck front axle has drum brakes in various sizes, depending on the
G.V.W., the mark II is fitted with disc brakes. The years around the change from mark
I to II have various combinations of parts fitted to the front axle; I have 3 different
lengths of track rod in my stock, and there may be other configurations (?).
It's not possible to combine mark I ends with mark II rods, as the internal thread in
the rod begins too deep for the Mk I ends.
Mk II ends fitted to the Mk I rod would
make the whole assembly too long, and may present problems at the clamp, though I
haven't ever tried this.
HOW TO PRODUCE THE TRACK-ROD
Disclaimer;
I accept no responsibility for any damage or loss incurred by anyone as a result of
following the method detailed in this article. I believe it to be based on safe practice
and advise that common sense should be applied throughout.
Please read and understand fully the whole text before starting work.
!DO NOT DISASSAMBLE THE ORIGINAL TRACK ROD! (Yet...)
(It's very hard work, so you may as well make sure you can do the job before
attempting this part.)
It's also used later as a template.
1. Obtain a (2 meter?) length of high-pressure steel gas pipe;
External Ø = 32 mm, Internal Ø = 20 mm.This can be hard to find, but it's the
only thing I could obtain that was up to the job unless you use a piece of solid round
bar. It's seamless and matches the dimensions of the original pretty closely O.D is
2mm less, I.D is also 2mm less.
2. Make a jig from a ½” (ish) thick wooden plank using the original track rod with it's
ends still in place; drill two 16mm holes that the ball-joint pins fit snugly into, so that
the threaded pin pokes out the other side.
3. Place the two straight ball joints in the jig. Measure the distance between the
ends of the threaded section; that is THE WHOLE OF BOTH THREADED
SECTIONS AND THE GAP BETWEEN THEM.
4. Cut the pipe to this length. This will vary according to the model of truck,
hence the need to use a jig. Keep the original track-rod and the jig.
5. The following operations need access to a lathe.
Thanks to my neighbour for carrying out this work so well on my behalf.
Machining operations;
• Drill both ends out to 21mm Internal diameter, 50 mm deep.
• Tap a 1.5 metric right-hand thread in one end, 49 mm deep
• Tap a 1.5 metric left-hand thread in the other end, 49 mm deep
• Reduce the outside diameter at each end by 1 mm for 40mm from end.
(This is to make the clamp fit and work properly later.)
6. Thoroughly clean and remove all traces of swarf from the work-piece.

7. Install the ball-joints, being sure to distinguish left & right-hand threads, and
taking care not to cross thread them. The original track-rod is harder than the
ball-joints, which are quite easily damaged by anything that gets in the thread.
They should wind in nearly all the way by hand. If not, clean and maybe chase
out the threads in the track-rod. Avoid using grease to aid this, penetrating
spray is O.K.
8. Once you are happy with the threads in the track-rod, if a milling machine is
available, cut a longitudinal slot into each end of the track-rod on the same axis
(the slots should line up with each other). Alternatively use a thin disc on an
angle grider, but be very careful not to damage any of the threads.

9. Clean out the threads again and check the ball-joints still go in easily.
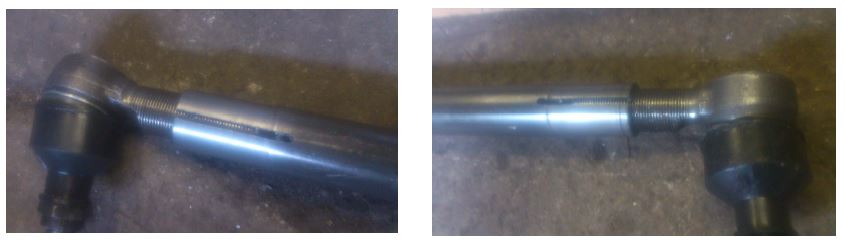
10. Put the track-rod in the jig, using it as a guide for adjustment, till the pins
engage snugly in the holes. Loosely fit the castellated nuts to the pins.
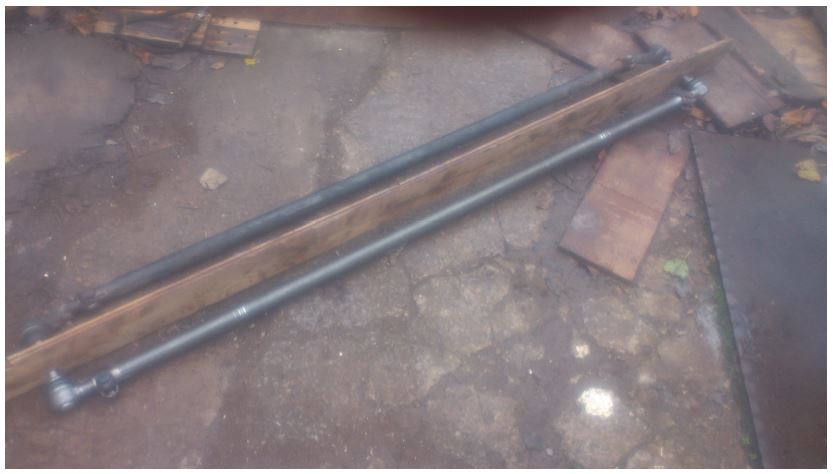
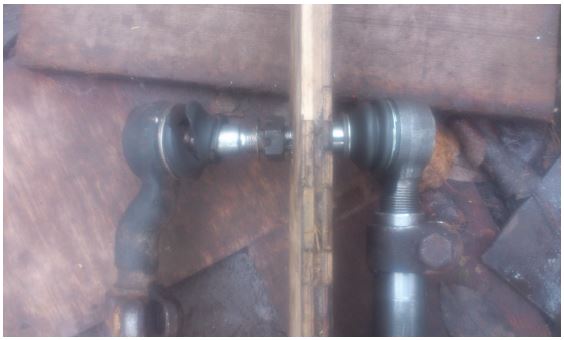
11. Line up the original track-rod with the new one in the jig and twist its' pins
into the nuts on the new one's pins as shown above. They should line up
perfectly, if not, your jig may be out or the holes through it maybe slanted?
If everything is O.K. You can now get the clamps off the old track rod to be
fitted to the new. Remove the ends from the old track-rod by any means you
can – it may be quite difficult lol.
Carefully cut through the welds that hold the clamps on with a thin cutting disc
and remove them from the rod. Don't damage the clamps.
12. Mark the ball-joints in the new track-rod with tippex or similar, then
remove them.
13. Position the clamps on the new track-rod so that the gap is over the slot at
each end.
14.Weld the clamps in place with a short slug on the opposite face to the slot
and on the side of the clamp that is furthest from the open end of the track-rod.
15. Replace the ball-joints into the track-rod to the marks, put the bolts into the
clamps and fit it to the vehicle. Tighten all nuts and bolts to the specified
torque There should be no need to check the tracking if all the above steps have
been followed, but is a sensible precaution and may help avoid expensive tyre
wear.
16. Have a cuppa, you deserve it. ;-)